Making an FFT Block in Vitis HLS – Part 1
Vivado has an FFT IP that you can customize and instantiate. I was considering doing this and simply adding it to the block design, but the FFT block requires a stream for data, as well as a stream for configuration. I will be getting the data stream from a and AXI-DMA block. I’m sure there are lots of ways to produce the configuration stream, but it seemed easier to me to be able to have a set of axi-lite registers for configuration, or even just use the configuration settings I think I’ll need and only have one stream. Because of this I’m going to write a simple IP core in Vitis HLS.
HLS is a tool that takes a subset of C++ and can produce an IP core that you can import, as well as vhdl and verilog files to use in simulations. It provides quick estimates of hardware usage, and also timing performance. It allows you to rapidly do complex algorithms, and tweak them. You use pragmas to decide which areas to pipeline, pipeline stages, interface types, and more. When you are satisfied with your code you write a self checking test bench in C++. This can then run in “Co-sim” where it runs the C testbench, as well as the same data in vivado-simulator and compares the results. This ensures that the synthesized design does produce the same results as the C code. There are a number of edge cases where this can fail.
In the course of figuring out how to make the FFT block for this tutorial I found out that the hls::fft function changed significantly in Vitis version 2022.1. In the latest version the fft function allows for more configuration options, and also can accept streams instead of arrays. In the interest of efficiency we should use version 2022.1 or later. If you haven’t already head on over to https://www.xilinx.com/support/download.html and download the unified installer for your platform. I’m running Ubuntu 20.04 LTS. Installing the Xilinx tools is out of scope for this tutorial. Digilent has detailed instructions here https://digilent.com/reference/programmable-logic/guides/installing-vivado-and-vitis. We’ll start in the next section with creating and HLS project.
Creating the HLS Project
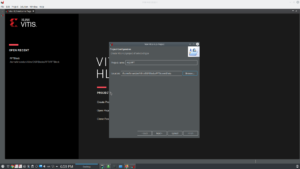
Open Vitis HLS and click on “Create Project” Fill in your name, and a location for the project.
Click next until you get to a screen that allows you to select a part. Click the … and at the part selection dialog choose “boards” and then your development board. I have a Z7-10
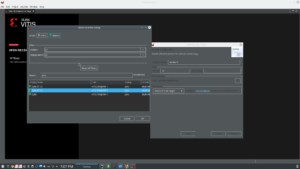
Click finish and we are good to go.
Adding Source Files
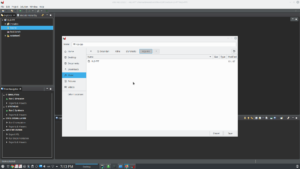
Right click on “Source” in the explorer tab on the left. Select “New Source File”. Give your source file the same name as your top function (not required but I like it this way) in the format myTopFunction.cpp.
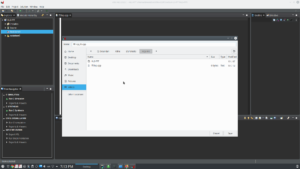
Next we need a test bench file. This is like a much unit test in software, we want to run data through our function and see if it gives us a sensible response. The difference in HLS is that we are also using this to make sure our firmware simulation gives us the same results as our C++ program.
Now our files are created. We can go ahead and start working on our FFT function.
Make a new file fftTop.h. We can put the following code in it:
#ifndef FFT_TOP_H
#define FFT_TOP_H
#include “hls_fft.h”
#include <ap_fixed.h>
#include <complex>
#define FFT_INPUT_WIDTH 16
#define FFT_OUTPUT_WIDTH 16
#define FFT_LENGTH 1024
#define CONSERVATIVE_SCH_1024 0X2AB
#define CONSERVATIVE_SCH_65536 0XAAAB
struct param1 : hls::ip_fft::params_t {
// static const unsigned ordering_opt = hls::ip_fft::natural_order;
static const unsigned max_nfft = 10;
};
typedef hls::ip_fft::config_t<param1> config_t;
typedef ap_fixed<FFT_INPUT_WIDTH,1> data_in_t;
typedef ap_fixed<FFT_OUTPUT_WIDTH,FFT_OUTPUT_WIDTH-FFT_INPUT_WIDTH+1> data_out_t;
typedef hls::x_complex<data_in_t> cmpxDataIn;
typedef hls::x_complex<data_out_t> cmpxDataOut;
typedef hls::stream<cmpxDataIn> cmpxDataInStream;
typedef hls::stream<cmpxDataOut> cmpxDataOutStream;
typedef hls::ip_fft::status_t<param1> status_t;
#endif
In the fftTop.cpp file we can put the following:
#include “fftTop.h”
#include <iostream>
void fftTop(cmpxDataInStream &in, cmpxDataOutStream &out, bool direction, bool &ovflo)
{
cmpxDataIn inArray[FFT_LENGTH];
cmpxDataOut outArray[FFT_LENGTH];
config_t config;
status_t status;
config.setDir(direction);
config.setSch(CONSERVATIVE_SCH_1024);
for (int i = 0; i < FFT_LENGTH; i++)
{
in >> inArray[i];
}

hls::fft<param1>(inArray, outArray, &status, &config);
for (int i = 0; i < FFT_LENGTH; i++)
{
out << outArray[i];
}
}
Right click HLS-FFT in the Explorer on the left, and select project settings. Click on synthesis and in “Top Function” enter fftTop.
Synthesis and Results
In the “Solution” menu click Run Synthesis=>Active Solution. This will take a couple minutes then it should geret you with performance and usage estimates.
Next Steps
We’ve left out some important things here,and our utilization could be better. In the next installment we’ll change some code and improve our results.
Leave a Reply